Browsing "Older Posts"

Browsing Category "Product Reviews"
When we purchased our 1960 farm house there were a couple old windows left up in the attic. I had the idea to transform one of the windows into a message board. When I was asked to review a set of liquid chalk markers, it seamed like the perfect opportunity!


How to transform an old window into a message board:


1. Give the window a good washing to remove the majority of the dirt. (I used the jet setting on my garden hose and it worked perfect.)


2. Use a box knife to cut off any pieces of old caulking.


3. If there are any metal pieces holding the glass in place, use a pair of pliers to remove them. Once these are removed the glass should easily pop out of the frame. Once the glass is out fill a bucket with hot soapy water and using a scrub brush, scrub the entire frame to remove any remaining dirt.


4. Use the pieces of glass as a template to cut out your chalkboard pieces. (You can find chalkboard at your local hardware store or make your own using any kind of thin board and painting it with chalk board paint.) A table saw would make cutting a lot simpler but if you don't have one you can score the board with a box cutter and break the piece off. 


5. For the center piece use a couple pieces of cardboard cut to size and cover them in fun fabric. The cardboard allows you to use pushpins to attach notes and keep them in a visible location. 


I decided to use one side to keep track of to dos and the other side was perfect for a shopping list. 


I absolutely love the vibrant neon colors of the ChalkOla Chalk Ink Markers. They perfectly matched the bright, fun fabric that I chose. 


These neon markers contain liquid ink so when you first receive them you'll notice the tips are white. 


Using some scrap paper, press the tip down for a couple minutes. You'll soon see the ink running down the tip of the marker. You'll only have to do this to new markers. Once used the ink will flow smoothly.


I love the huge tips on the larger chalk markers. They make larger projects a lot easier.

I love that these markers don't smear easily like regular chalk. This makes them perfect for using with projects that may be handled a lot or in a classroom or other area with kids who like to touch things. The package states that they are best used on non porous surfaces such as glass, whiteboard, mirrors, plastics, chalkboards, and ceramics.

I was amazed at how vibrant the colors looked against the dark chalkboard and couldn't wait to test them on other surfaces. We have beautiful glass door that separates our living room from our dining room. I decided it would be fun to decorate it for the upcoming holiday! 


Ok, so I may not be the best artist but my kids where pretty excited about the window so that's!!

You can purchase your own chalk markers on the ChalkOla website or at amazon HERE (15mm Markers) or HERE (6mm Pens) .

Get 20% off!!!

  • Enter the code CHK20OFF to get 20% off the 15mm Markers.
  • Enter the code CHALK20A to get 20% off the 6mm Pens.


If you enjoyed this post, don't forget to pin it for later.


Disclaimer: In exchange for this post I received a free set of chalk markers. All opinions are 100% mine.


Stay up-to-date on any new printables, tips, tutorial, recipes, family fun, and much more by joining DIY Home Sweet Home's social networks.
{click on an icon below}

Image Map

Diy Message Board Using Recycled Window and Neon Chalk Markers

By Unknown → Monday, October 26, 2015
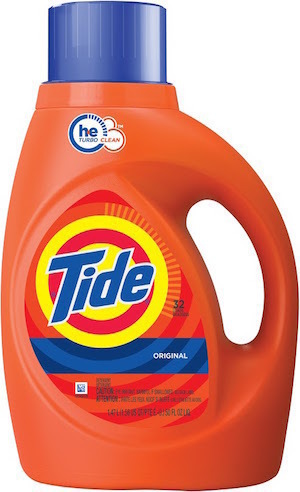
This is a sponsored post written by me on behalf of Tide® HE Turbo Clean™. All opinions are 100% mine.
When my oldest was born seven years ago, I never imagined how much laundry one child would add to the load. I went from doing laundry once a week to several times during the week. Since then we have added a second child to the mix and now it seems as though every day is laundry day. As parents the laundry cycle is a never ending cycle.

I would like to introduce you to What’s Up Moms. They are the #1 parenting channel on YouTube. P&G Tide has partnered up with What’s Up Moms to show moms like us how Tide® HE Turbo Clean can help “conquers the laundry”. They have created this hilarious video showing the struggles moms have with laundry.


I had no idea that SUDS could be the culprit in slowing down the laundry process!! Thankfully Tide has come up with a first-of-its-kind, the HE Turbo Clean™ formula that is the #1 recommended detergent by leading HE washer manufacturers. It is available in Tide® liquid detergent, Tide Pods® pacs and Tide® powder formula.


By using proprietary, quick-dissolving Smart Suds™ technology Tide® HE Turbo Clean™ detergents save time and water helping prevent HE Machines from running additional rinse cycles. Tide® HE Turbo Clean™ will save you up to 25 minutes of your time and create a more efficient laundry process.


Many HE washing machines have 40% larger drums (vs. traditional machines) and can wash up to 32 pounds of laundry. This also means that a load can contain 40%+ more dirt. EEW!!!! However, when using Tide® HE Turbo Clean™, by following their recommended dosing instructions and adding the proper amount of detergent with your load and soil level you can expect nothing less than clean.

undefined

Would you like to see my laundry routine? This routine is not for everyone but it is what works for me and my family.
  • Monday – White t-shirts and towels
  • Tuesday - Socks, underwear, and rags
  • Wednesday – Shirt and dresses
  • Thursday – Shorts and pants
  • Friday – Sheets
  • Saturday – Hubby’s work clothes
  • Sunday – NO LAUNDRY!!!
Not every week follows this schedule perfectly and some days I do more than one load but for the most part this is it.
Here are a couple rules I follow.
Sort by type not color. Other than the white t-shirts and towels (which are also white), I don’t sort any other laundry by color. Doing laundry this way makes it so much easier to fold and put away the clothes. For example, Tuesdays require no folding. I just sort socks and underwear into three piles (mine, hubby’s, and kids) then all the rags get tossed into a box that goes in the hall closet.
Not everything needs to be folded. I used to fold everything. And I mean EVERYTHING!! I never realized how unnecessary it was and how much time I was wasting by folding every little thing. Now the only things I fold are pants, towels, and the occasional spare sheet or blanket. Socks and underwear all get tossed into a drawer. Rags are stuffed into a box that hides behind a closet door. All tops and dresses get hung up.

Do you have any laundry tips you would like to share? Please leave them in the comments below.

undefined
Visit Sponsors Site

Conquer The Laundry

By Unknown → Monday, June 29, 2015
I just wanted to share a quick post about how I have organized my office using my label maker.

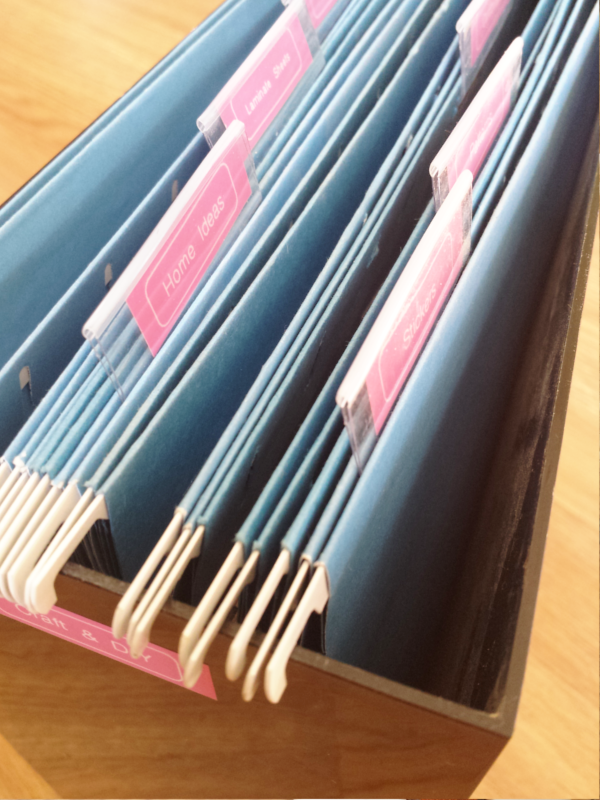
Keep a small file box on your desk with items that you use most often.
I have a file box that sits on my desk and holds some of my most used craft items such as patterns, stickers, and cardboard. (Please tell me that I'm not the only one who cuts the sides off of the cereal boxes and saves them! You never know when a sheet of cardboard will come in handy!) I use to print labels off on my computer, however, the label make makes it so much easier.


Use inexpensive shoe boxes to organize office supplies.
These clear shoe boxes cost less than a dollar and are perfect for organizing craft and office supplies. I love that they are clear so that you can see whats inside of each one, however, I kept confusing the two boxes with tape and ribbon. Adding labels to the boxes made it easier to know what was inside each box, not to mention that pink labels just make them look prettier!!


Use a binder clip as a bookmark.
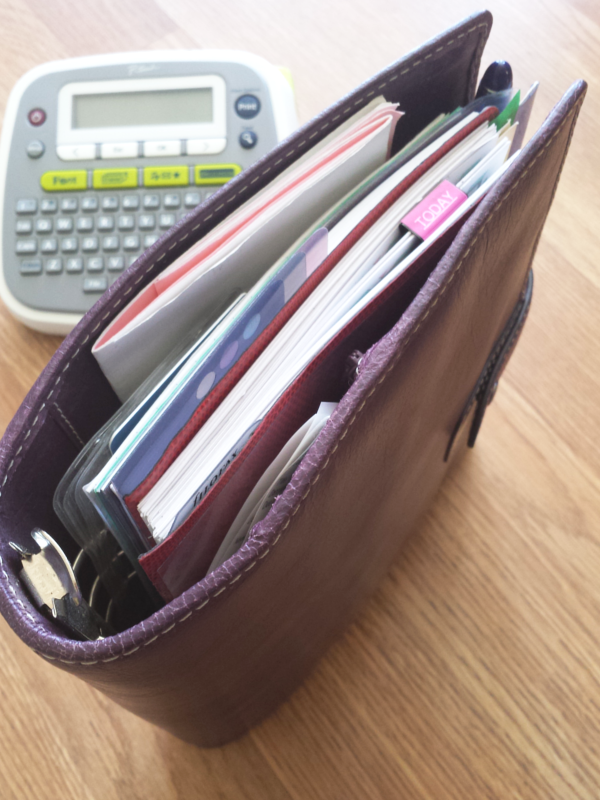
This last idea is one that I use most often and it is so simple. Just place a label on a binder clip and you have a simple bookmark. I have several of these at my house! I use them in my planner, my Home Management Binder, the girls' homeschool binders, art journals, and many more. 


Any label maker will work for these projects but I have to say that I absolutely love my Brother P-Touch Label Maker. The Brother P-Touch Label Maker has many different options to choose from (boarders, icons, font style and size, tape and font color, to name a few) to allow you to completely customize each label. 

Do you have any creative ideas for using label makes to organize? Please share them in the comments below.

If you enjoyed this post, don't forget to pin it for later.


Stay up-to-date on any new printables, tips, tutorial, recipes, family fun, and much more by joining DIY Home Sweet Home's social networks.
{click on an icon below}


Image Map

Disclosure: I've partnered with Brother P-Touch to bring you this post. I may have received compensation and/or products.
But all opinions are my own, as always.

Office Organization with Labels

By Unknown → Monday, April 6, 2015

This is a sponsored post written by me on behalf of RO*TEL & VELVEETA for IZEA. All opinions are 100% mine.
During parties and small get-togethers I often whip up a quick Queso for guest to snack on when they arrive. With the combination of RO*TEL and VELVEETA, Queso is zesty, creamy, yummy, and so easy to make. I literally just toss the two ingredients into the crock-pot and forget about it till guests arrive. Last weekend I decided to kick it up a notch with a few added ingredients to make a taco Queso dip. The results were delicious!! While I thought I may have made too much, our guests ended up eating every last bite. Queso For All
Taco Queso Dip with RO*TEL & VELVEETA
Ingredients
  • 2 cans RO*TEL
  • 1 package (32 oz) VELVEETA
  • 1 tsp ground cumin
  • 1 tsp chili powder
  • 1 tsp oregano
  • 1 tsp garlic powder
  • 1/4 cup sour cream
  • 1 lb ground beef
Optional ingredients (could be added to the crock pot or kept aside for guests to create their own unique dip to their liking.)
  • Diced onions
  • Diced olives
  • Diced jalapenos
  • Chopped parsley
  • Extra sour cream
  • Avocado chunks
Directions
  1. Add RO*TEL and VELVEETA to the crock-pot and set on low.
  2. Brown the beef and drain any excess liquid.
  3. Add the beef and any remaining ingredients to the crock-pot.
  4. Heat until all cheese is melted (about 2-3 hours), mix well and serve.

I prefer to add the onions, olives, and jalapenos to the dip. However, we had a couple guest who do not care for onions and olives and since there were little ones there as well, I chose not to add the jalapenos either. This worked out perfect as each guest was able to add their preferred ingredients to their liking.

Click here to make your own football snack cup. 

For more amazing recipes follow Ro*Tel Facebook and Velveeta Facebook
Visit Sponsor's Site

Taco Queso Dip Recipe & Free Printable Football Snack Holder

By Unknown → Friday, January 23, 2015

This is a sponsored post written by me on behalf of Holmes Products for IZEA. All opinions are 100% mine.

Cold and flu season is never fun especially if you have kids but there are ways to help prevent your family from getting sick. Here are a few natural cold and flu preventives to put to the test this season.

1. Hand Washing

This is a no-brainer. Make sure everyone in your family is washing their hand often using soap and water. Wash hands before meals (even small snacks), after outside play time, and after being in any public area.

2. Keep Hydrated

Drinking plenty of fluids throughout the day can help keep your mucous membranes moist so they're better able to trap viruses. Try to drink a minimum of 8-10 glasses of water daily.

3. Probiotics

Probiotics have immune system-boosting benefits. In our home, we eat yogurt (with live cultures) almost on a daily basis but there are also other ways to consume probiotics. Kefir, pickles, bananas, artichokes, green beans, and honey are just a few examples of probiotic rich food.

4. Elderberry Syrup

Elderberry have been known to naturally boost your immune system. You can find this in most stores or grow your own elderberry plant and try making your own.

5. Raw Garlic

Garlic is packed full of amazing health benefits including building the immune system and fighting infections. If you can't stand the taste of raw garlic you can buy garlic capsules at any health or drug store.

6. Sleep

Lack of sleep can weaken your immune system making it harder for your body to fight of infections.

7. Humidifier

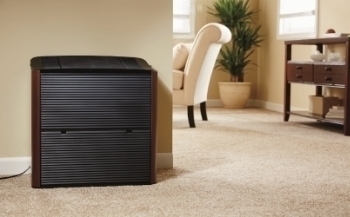
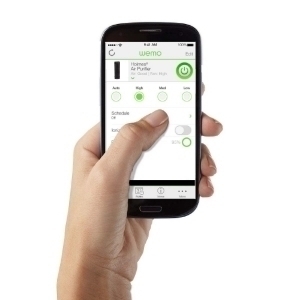
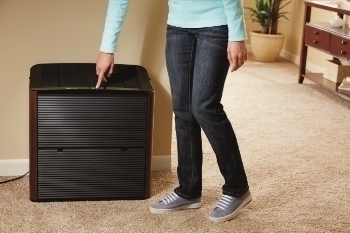
Studies show that flu germs survive and spread more easily in dry air conditions. Dry air can also cause congestion in the sinuses, leading to sinus pain and sinusitis. Boosting your indoor humidity level will allow the nasal cavity to drain properly and can make if hard for flu germs to survive and spread to those around you. If your in the market for a humidifier, i recommend the Holmes® Smart Humidifier Console with WeMo technology.
Izea.humidifier.backgroundIzea._air.purifier.app__2_
  • Optimize the right level of humidity for your home, based on the current weather conditions.
  • Control your humidifier settings anytime, from anywhere, using your smartphone or tablet.
  • Has a smart sensor that monitors the environment inside and outside your home, and then you.
  • Choose between 5 comfort levels.
  • Provides humidity to the entire house so the whole family stays comfortable during the winter months.
  • 36-hour runtime, so there is no constant refilling of water tanks.
  • The filter reminder conveniently tells you when to reorder and allows you to purchase immediately through the app.
  • WeMo comes in handy during life’s We Moments - A “WeMoment” is the feeling of relief in being able to adjust your technology to better your life. For example, it’s the time the mom in Connecticut heated her basement from her smartphone and didn’t have to go down into the cold basement to turn on the space heater prior to doing laundry.

With WeMo technology the Holmes® brand delivers on the promise of the connected home with simple, scalable home automation solutions that empower consumers to customize, control and manage home electronics from anywhere. WeMo is the most affordable and approachable entry into the smart home and makes managing your home easy.

Izea.humidifier.inuse

Get more information and check out the other Holmes products such as their air purifiers and smart heaters by visiting the Holmes Products page.

Visit Sponsor's Site

Natural Ways to Prevent Cold and Flu

By Unknown → Saturday, December 27, 2014
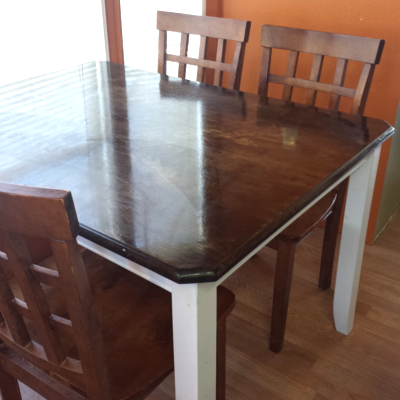
Two months ago my husband and I decided to give our kitchen table a makeover. I do not have any before photos but our table was in pretty bad shape. It was covered in scratches and had several water rings. After looking through pinterest for inspiration, this is what we came up with.


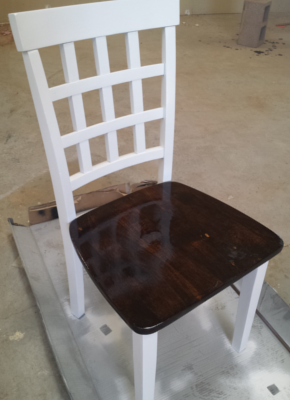
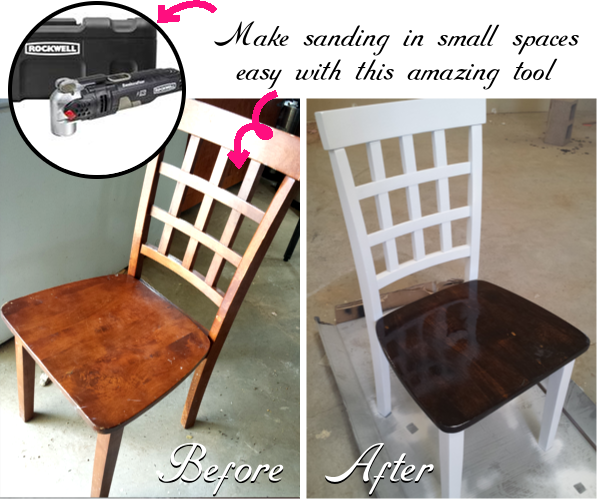
We sanded down the entire table, painted the base white, and stained the top with a dark walnut stain. We were absolutely in love with the outcome and were eager to get started on the chairs. Unfortunately our chairs have a lattice pattern on the back and we realized that our sander would not be able to get into all the spaces. 


 I was pretty bummed out thinking that I would have to sand all those nooks and corners by hand. However, as faith would have it, I was introduced to this bad boy*. (Want one of your own? Scroll down for a special coupon code to receive 15% off!!)


The Sonicrafter F50 is a 4.0 amp oscillating multi-tool with hyperlock. This thing is seriously amazing!! The hyperlock tool-free blade change system provides 1 ton of clamping force to prevent blade slippage. There is a variable speed dial for precision control. Also the universal fit system accepts other brand accessories!

The best part about this tool is that it fits into the tiny spaces on our chairs. Yay!!!! 


 Ok. On to the tutorial...

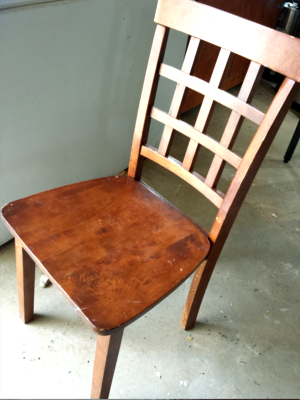
We knew we wanted the chairs to match the table so we decided on staining the seat and painting the rest of the chair white. 

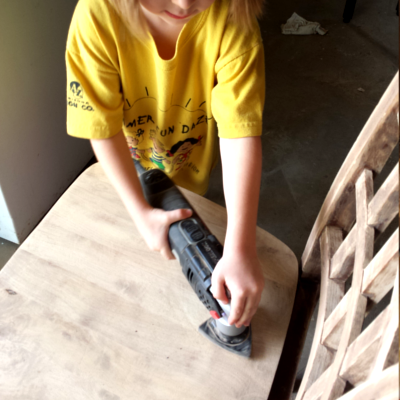
We went over the legs and the back of the chair with the sander attatchment, just enough to give the paint something to stick to. Look at how perfectly the Sonicrafter F50 fits into those small spaces!! 


The seat of the chair was sanded completely down to the original wood. Check out my little helper!! My 5 year old absolutely loved using the Sonicrafter F50!!


After the chair base and seat were sanded, we began prepping the base with a coat of primmer and the seat was coated with pre-stain conditioner. Then we began the process of painting and staining. Finally we applied a coat of polyurethane to the seat to seal it. 

Due to all the waiting around and letting the chair sit in between coats, this project took two days to complete. However, if it were not for the Sonicrafter F50 it probably would have taken an extra day just to sand everything. This tool definitely saved me a lot of time during this project and I know it will save me a lot of time in the future. 


 If you are looking for an amazing gift for that special handyman in your life, Rockwell's Sonicrafter F50 is definitely worth considering. However, Rockwell also has several other products to choose from. Visit there page to find the perfect gift for your loved one or buy a few things for yourself! Rockwelltools.com
Also, now through December 31st, 2014 Diy Home Sweet Home readers can recive 15% off tools at Rockwelltools.com!! All you have to do is use the coupon code HOMESWEETHOME15 at checkout.


My personal run down of the pros and cons or Rockwell's Sonicrafter F50...

Pros
  • The ability to use accessories from other brands! I am not locked into using only one brand! This tool gives me the option to use whatever accessory I think will best fit my needs even if it's made by another company!!
  • The speed dial!! This option definitely allows me to have more control over the project I am working on.
  • Hyperlock tool-free blade change system! I love that the clamping mechanism doesn't require any extra tools. I don't have to waste time searching through the garage everytime I need to change the blade.
  • Provides 1 ton of clamping force to prevent blade slippage! The blade didn't move at all throughout this entire project!
  • My husband loves it. This is a huge deal because my husband works with tools all day long and in his opinion most multi-tools are... well, this is a family blog so I don't think it would be appropriate to tell you my husbands honest opinion of multi-tools, but in most cases he would rather spend twice as much money on buying individual tools than waste it on a multi-tool. However, he definitely approves of the Rockwell's Sonicrafter F50 and in his own words "It's definitely worth the money!". In fact he was so excited about this tool that he had to show it off to some of his friends and now they want one too!!

Cons
  • When doing product reviews I usually provide cons as well, however, I have yet to find anything negative about this tool.
 
Stay up-to-date on any new printables, tips, tutorial, recipes, family fun, and much more by joining DIY Home Sweet Home's social networks.
{click on an icon below}

Image Map


* I received free products in order to do a review on this blog. I received no compensation in the form of money. All opinions are 100% mine.

Chair Makeover Using Rockwell Sonicrafter F50

By Unknown → Wednesday, December 10, 2014
** GIVEAWAY HAS ENDED**

Halloween may be over with but many children are still enjoying the sweet sugary after effects. Crest® + Oral-B® would like to help you brush away all of the sugar left over from Halloween with their battery toothbrushes and coordinating toothpaste.

I received some battery toothbrushes and toothpaste from Crest® + Oral-B® Pro-Health Stages™ to review. My girls were in love with the popular Disney characters. They couldn't wait to use them!!


One of the biggest struggles in my home when it comes to brushing teeth, is getting the girls to slow down and take their time instead of trying to rush through the process. When I discovered that Disney had a magic timer app I knew I had to try it.


The Timer app allows each child to create a profile. When it's time to brush their teeth they just scan their toothbrush and the timer starts. Over a time period of 2 minutes, the bubbles on the screen are scrubbed away to reveal a picture. Each picture they complete gets to be saved as a "prize" in their photo album. 


The girls really love this app!!! They no longer rush through brushing their teeth and they can't wait to collect more photos!! You can find a video of the app here: http://www.oralb.com/stages/disney-timer-app


DOWNLOAD DISNEY TIMER APP!!


If your home is filled with an excess of Halloween candy, here are a few tips from America's ToothFairy to keep you and your family from overindulging in sugary treats!
  • Set up a candy bank where your kids can make limited withdrawals from their Halloween stash.
  • Collect excess candy and make a care package of sweets for a soldier stationed overseas.
  • Save a portion of candy for making holiday crafts, gingerbread houses and decorations.
  • Check with your local shelter, food pantry or nursing home to see if they accept candy donations.
  • Ask your pediatrician or dentist if his or her practice hosts a candy buy-back program where kids can exchange their candy for money, toys or other tooth-friendly items.
  • Let all the toothless monsters you saw on Halloween remind you to take care of your smile all year round. Brush and floss twice a day and visit your dentist once every six months!
To receive educational activities, tips and personalized letters from the ToothFairy join the America's ToothFairy Kids Club!

Find Crest® + Oral-B® Pro-Health Stages™ Battery Toothbrush and toothpaste at your local Walmart! 

Crest® + Oral-B® Pro-Health Stages™ also has a DVD Offer

Save $7 by mail-in rebate via pre-paid card!
Buy any TWO Crest or Oral-B Pro-Health Stages products (excludes trial/travel size) plus Disney’s Sleeping Beauty or Disney’s Planes: Fire & Rescue Blue-ray Combo pack or Disney’s Frozen Sing-Along Edition to receive a $7 rebate by mail

Ok.... Now onto the GIVEAWAY!!

Two lucky winners will receive two Crest® + Oral-B® Pro-Health Stages™ Battery Toothbrush and toothpaste.

To enter leave me a comment with your child's favorite Disney character(s).
Giveaway will end Friday Nov. 14th and I will announce the winner on Saturday the 15th.
Good Luck!!

Stay up-to-date on any new printables, tips, tutorial, recipes, family fun, and much more by joining DIY Home Sweet Home's social networks.
{click on an icon below}

Image Map

Brushing Away the Sugar!! +Giveaway!!

By Unknown → Monday, November 10, 2014

Powered by themekiller.com